RecruitHire by 500apps is an all-in-one recruiting software that allows you to add and track jobs, candidates, and a variety of other information. It enables you to hire without any hassle by utilizing an applicant tracker, career portal, job posting forms, and resume parser that are all built-in to the software to facilitate recruitment. Powerful Automations are available through RecruitHire and can be used to automate the hiring process by utilizing triggered questionnaires, email templates, and multiple levels of screening stages. Integrating RecruitHire with your existing email providers will make the hiring process much simpler.
This article provides an overview of how the RecruitHire app works and what you need to know to get started with RecruitHire.
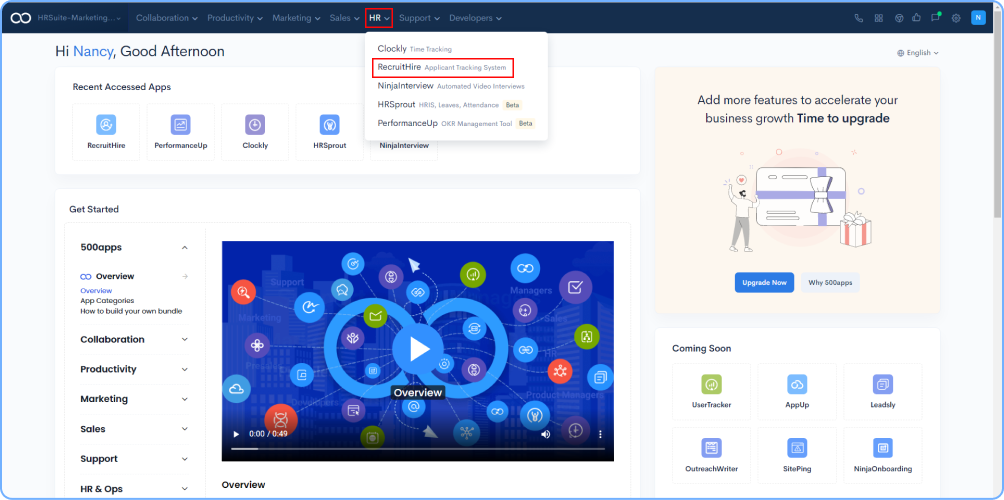
Go to infinity.500apps.com > Select HR from the top bar > Select RecruitHire
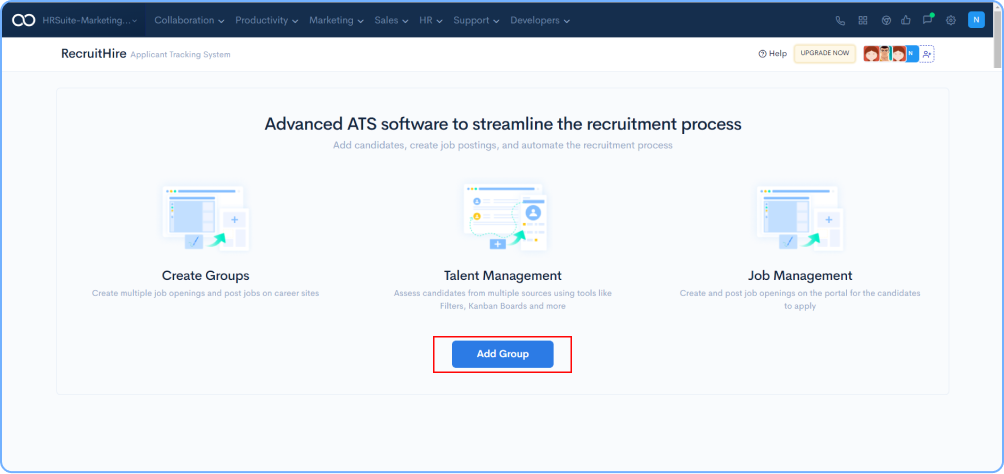
Login to the application RecruitHire and click on Add Group
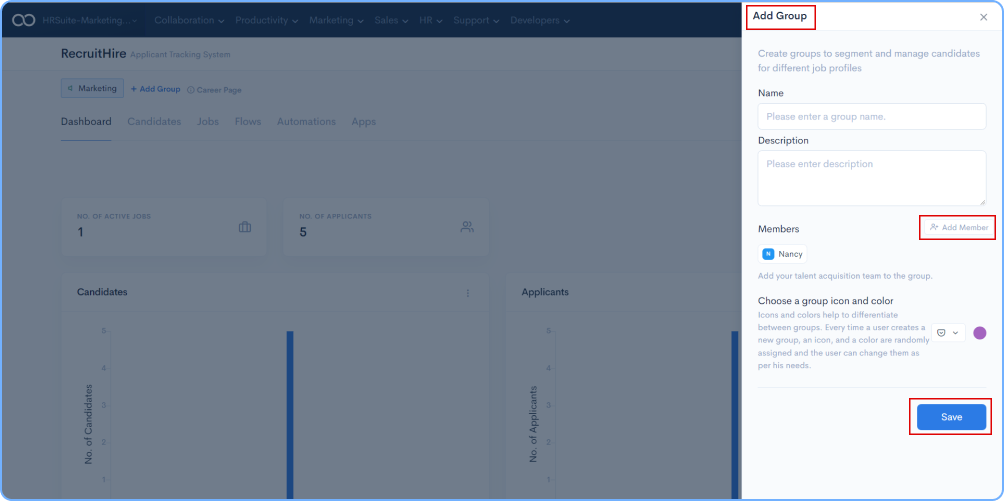
On the RHS popup, add the group name followed by a description, add members to the group and click on the Save button.
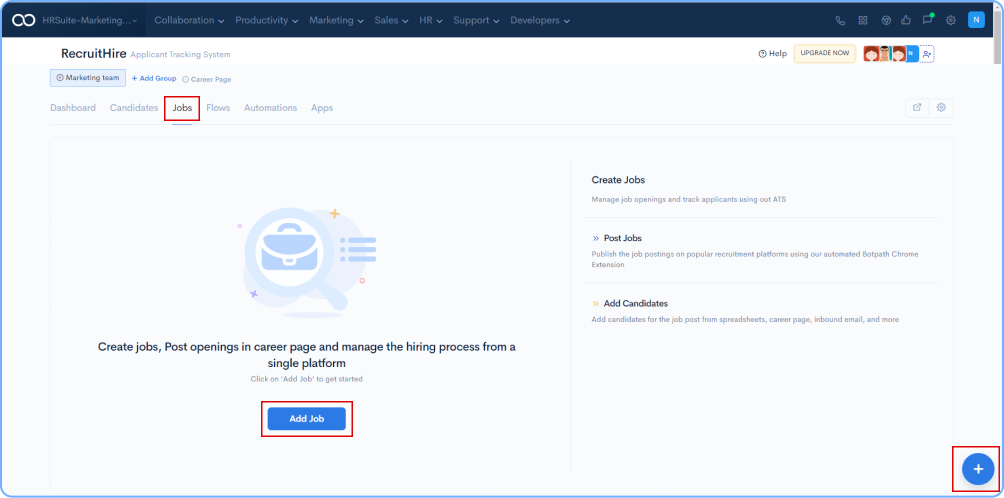
Go to the Jobs section in the Group dashboard, and click on Add Job or + to add jobs to the group.
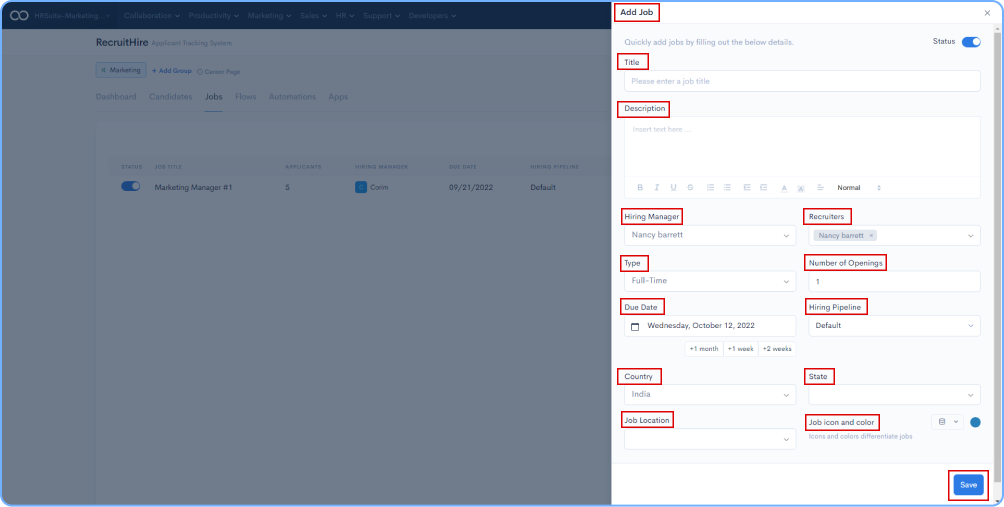
On your RHS popup, fill in the title, description, hiring manager, recruiters, job type, number of openings, due date for job position, hiring pipeline, country , state, and job location and click on the Save button.
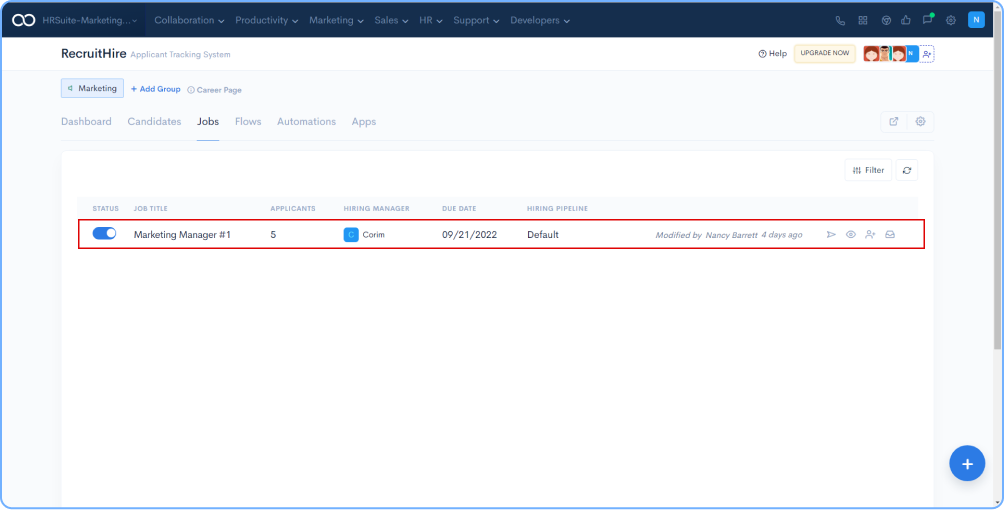
Once the Job is added the dashboard will get created as shown in the image.
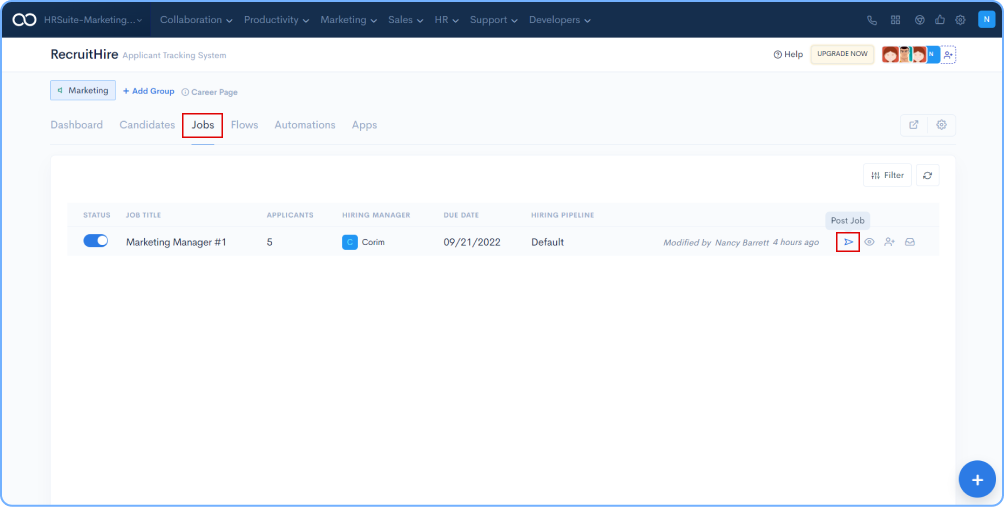
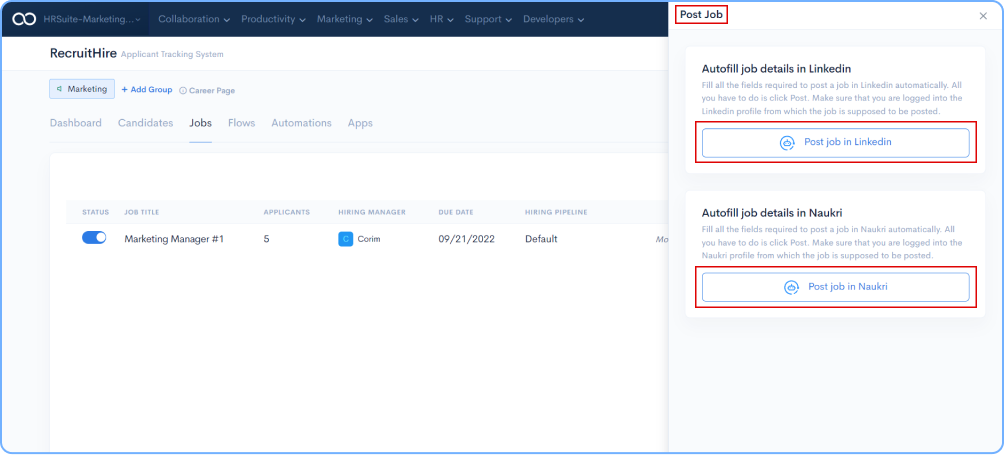
Go to the job that you have created and click on the Post Job icon.
Install the Bot (BotPath Chrome Extension) to your browser. Click on Post Job and select the Platforms where you want to publish the job, like LinkedIn or Naukri.
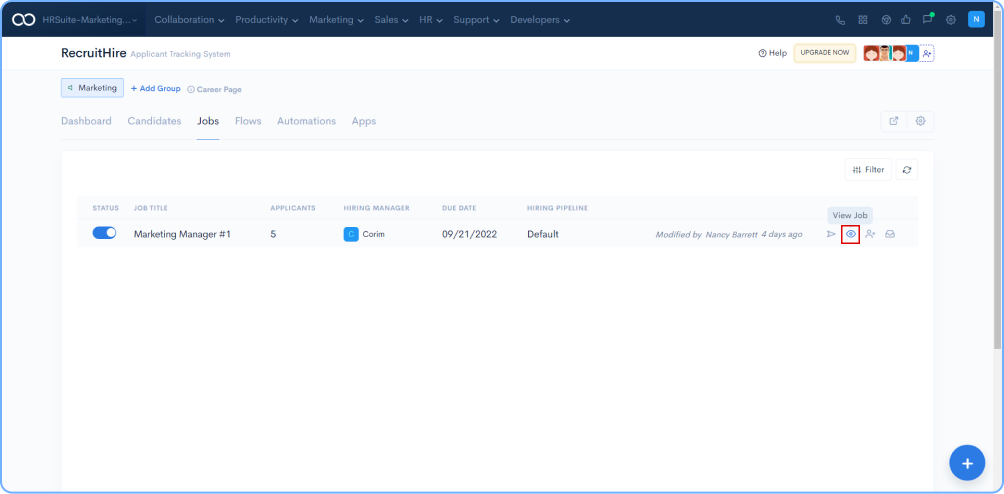
Click on the View Job icon on the RHS side on the dashboard.
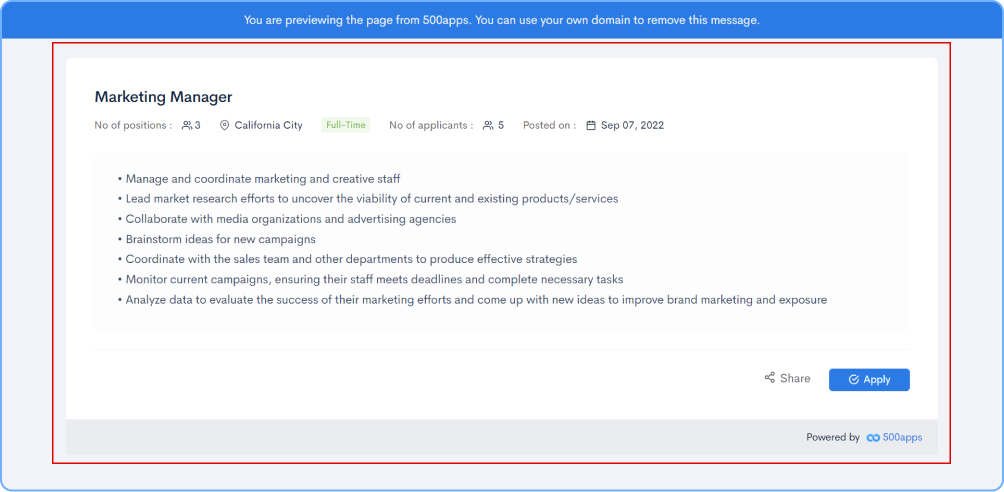
After clicking on View Job, in a new window you can see the job posting with the required information.
Add Candidates to the job posted by clicking on the Add Candidates icon in the dashboard.
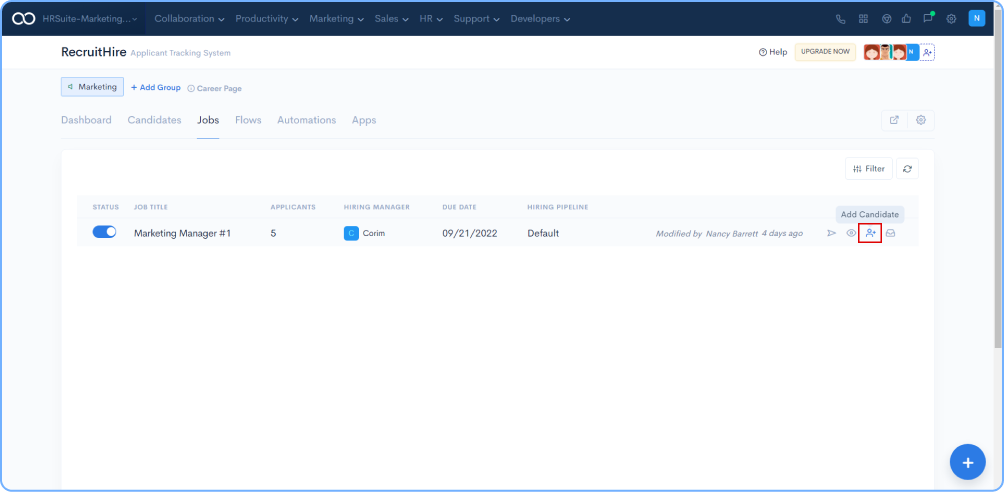
After clicking on the icon on your RHS you will see a popup with details required to add the candidate for the job opening. Fill the required fields and click on Save button.

Click on Add More Fields in order to add custom fields relevant to candidates and job positions.

Custom fields can be added based on requirement as shown in the image below.
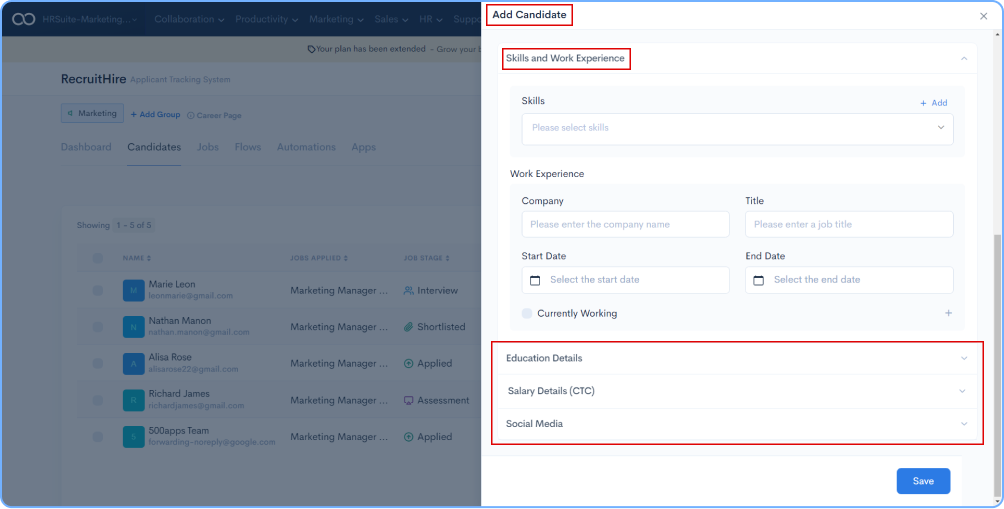
Click on the Upload Resume option and Please upload the candidate's resume. The resume parsing software will search and extract candidate information like name, email address, skills, etc., and populate the candidate fields.
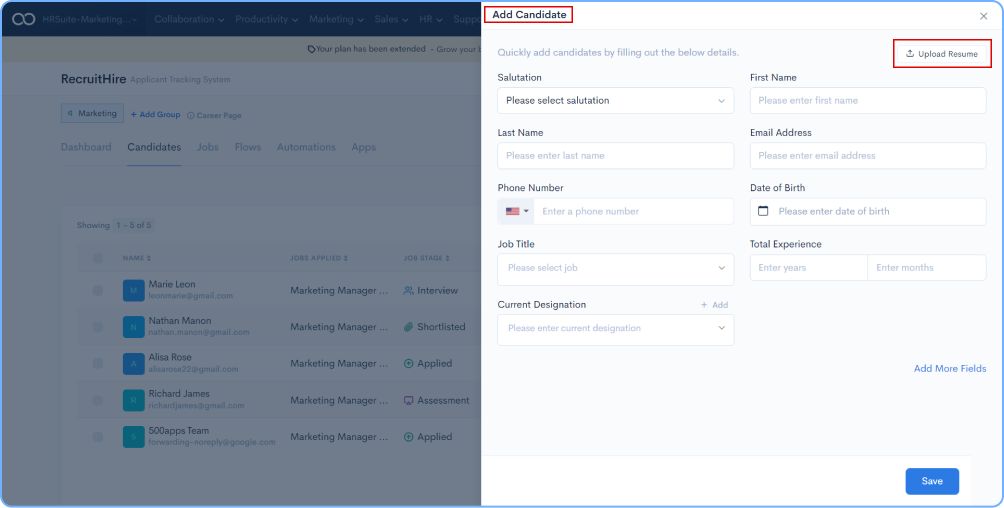
Maximum supported file size is 10MB (supported file formats are .doc, .docx, .pdf)
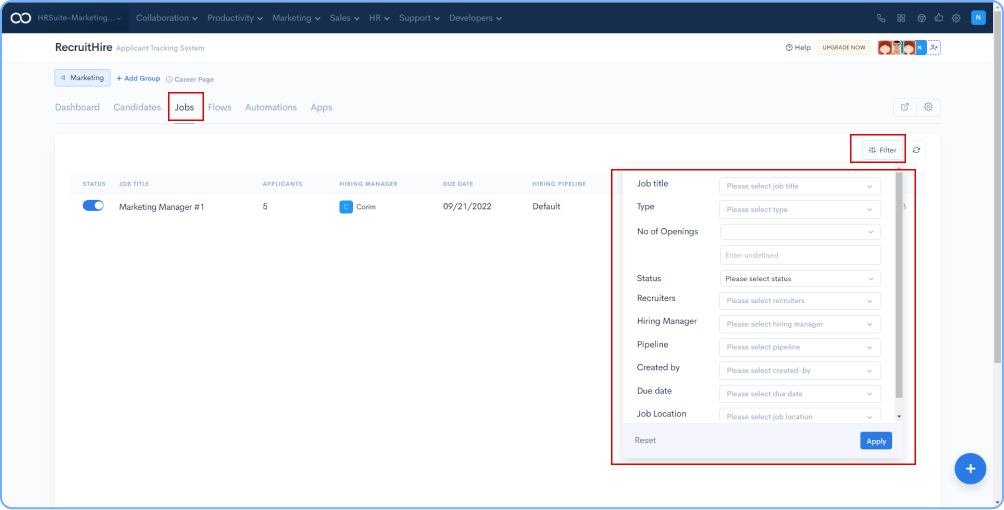
Click on the Filters icon on your RHS on Jobs dashboard. As shown in the image below.
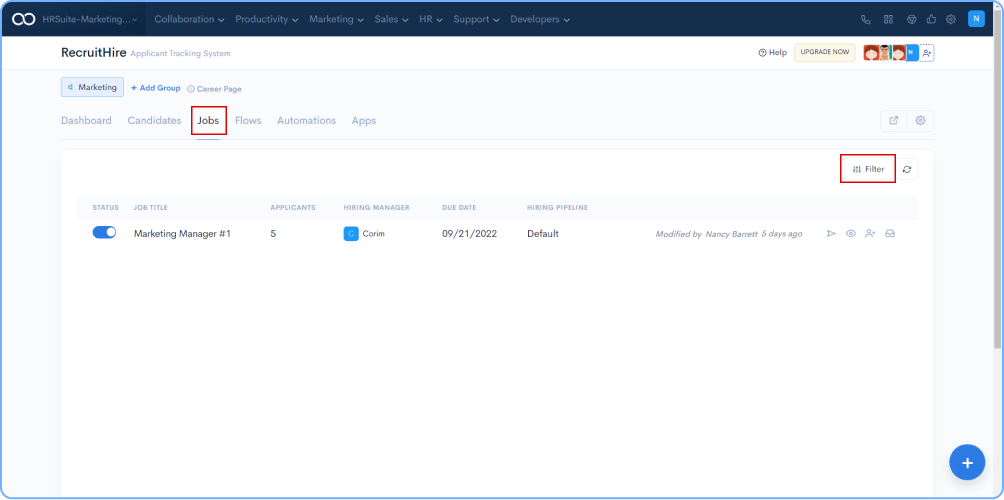
Filter the required candidates through Filters Option.
Click on Inbound Email Settings to get job applications from potential candidates via email.
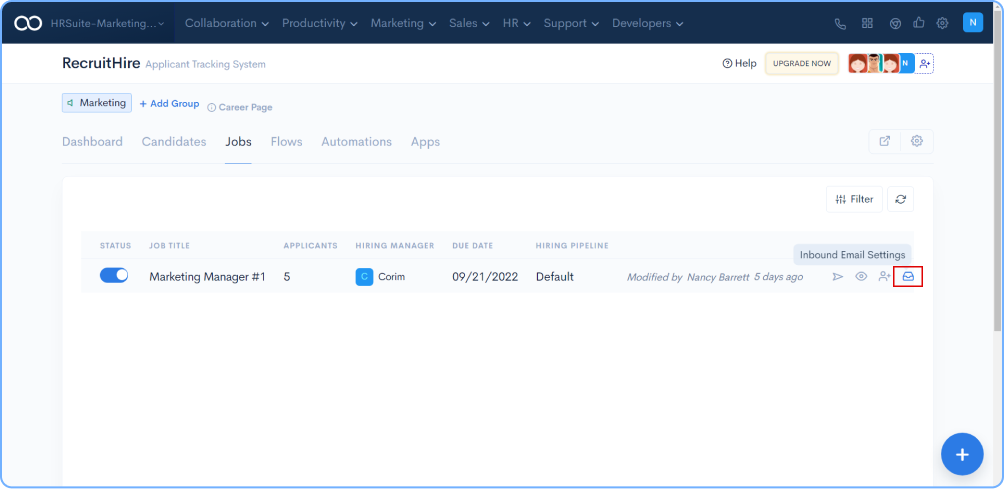
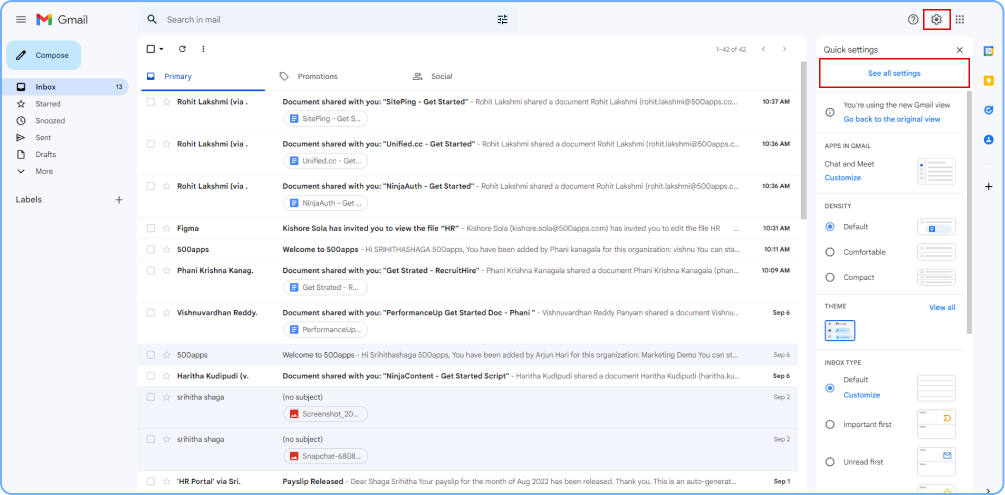
Go to your mail settings and click on See all settings.
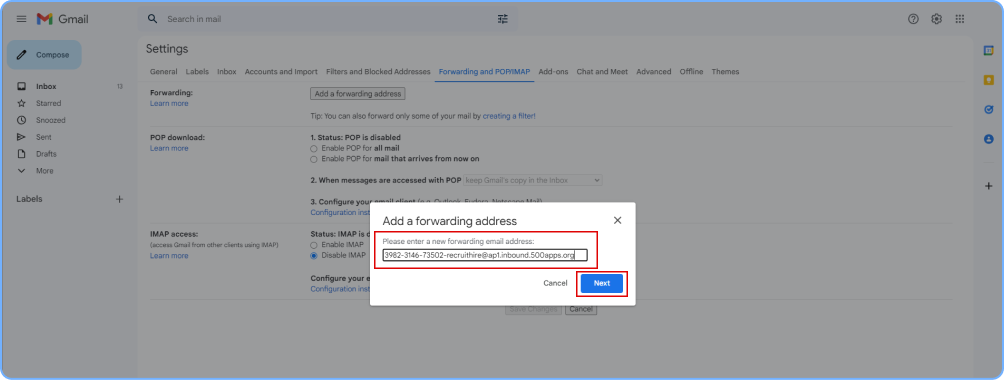
Click on “Forwarding and POP/IMAP” and paste the forwarding address and click on the Save button.
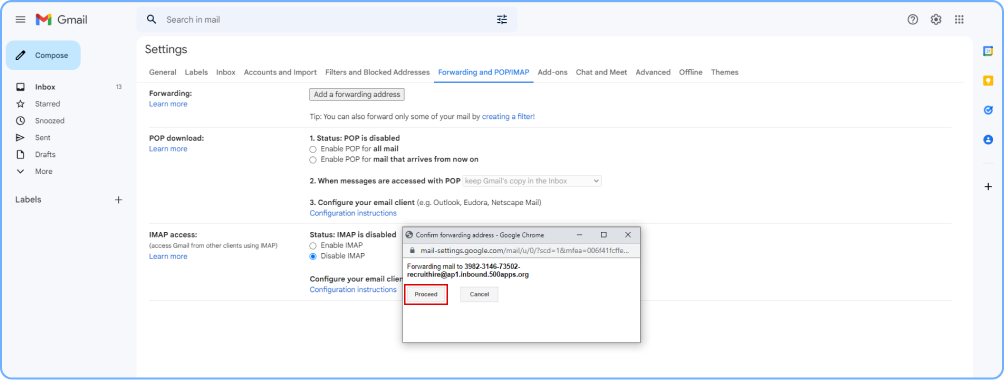
Click on the Proceed button on the popup that appears.
Click on the Verify button.
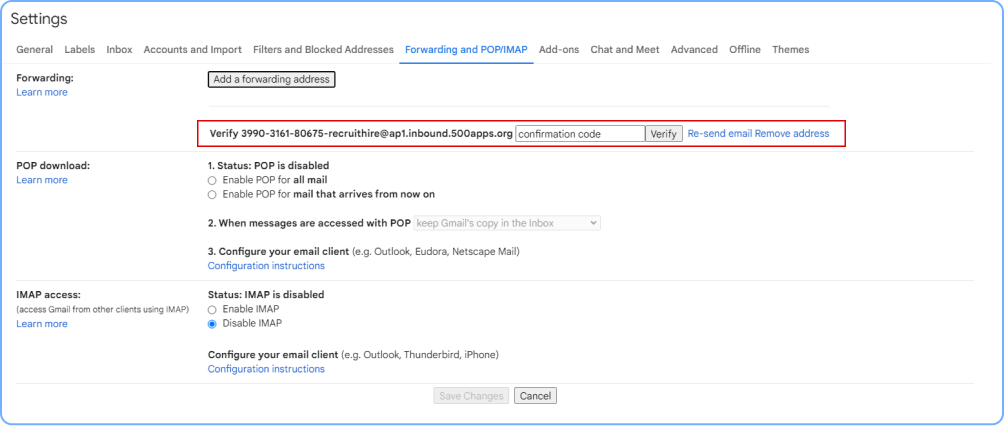
In RecruitHire a new candidate is created with a confirmation code.
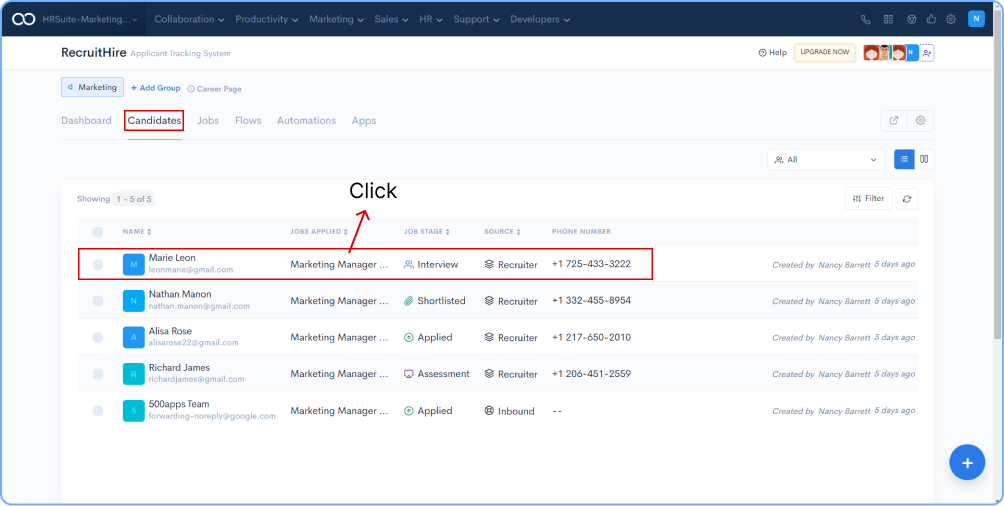
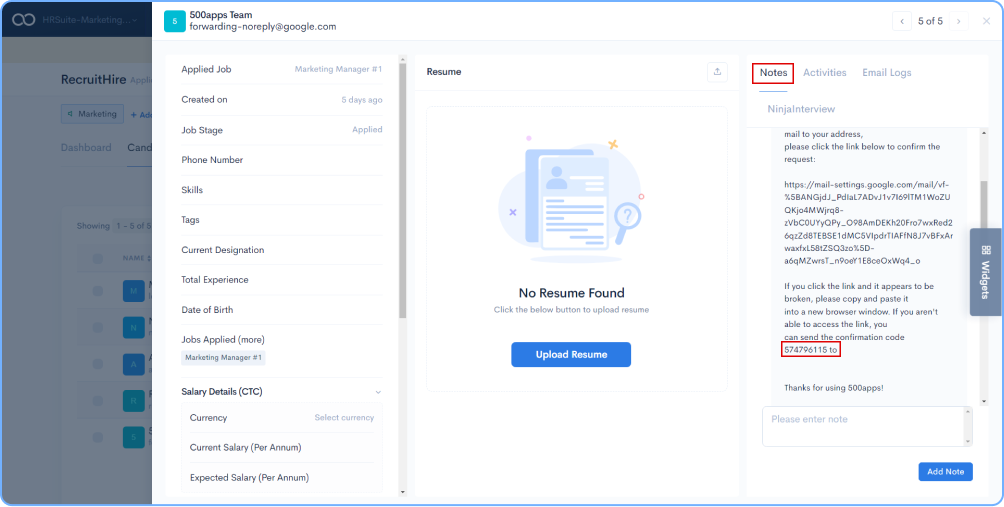
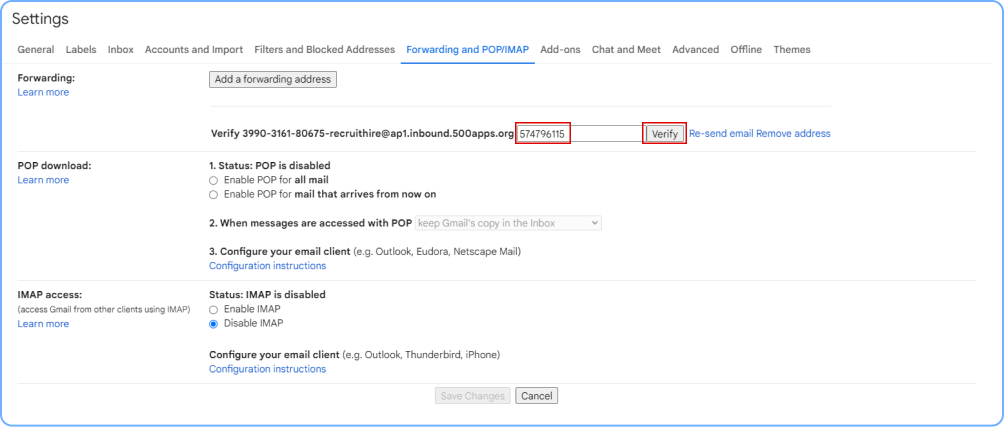
Copy and paste the code into your email account and hit the Verify button.
At the end, click the Verify button in your email. Now, your help desk is ready to use.
Click on Flows on the dashboard and click on Add Flow
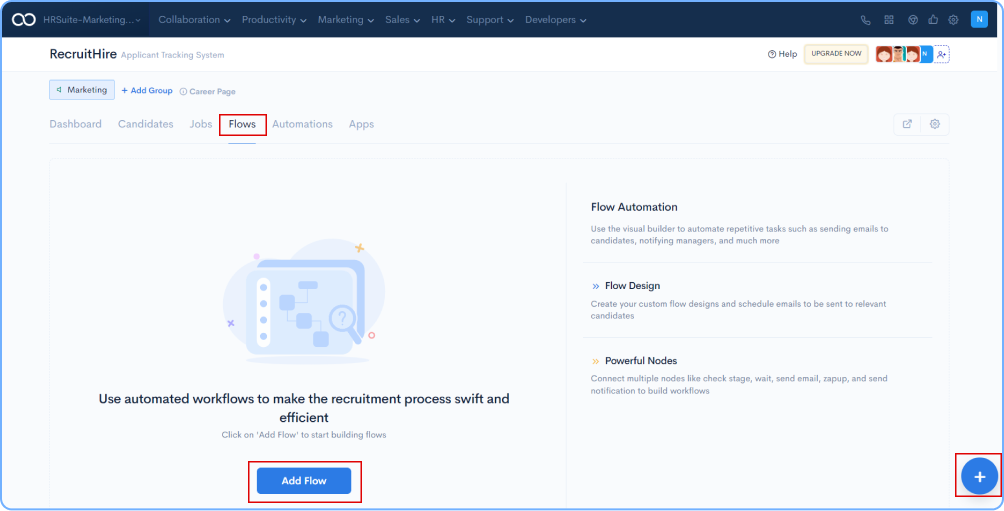
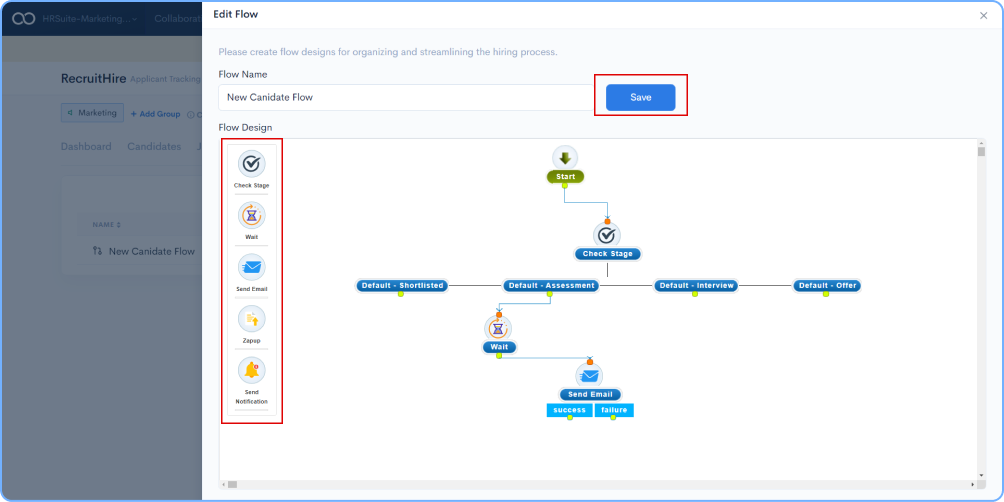
Start creating flows as per your requirements.
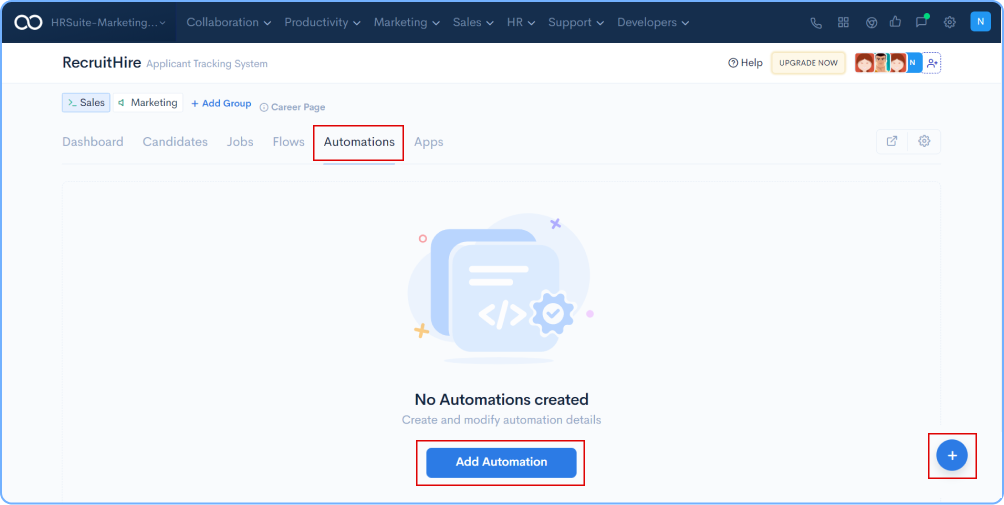
Click on the Automations on the dashboard and add automations by clicking on + Icon
Select the trigger Name and Automation Type, click on Save Button.

Click on the Settings icon towards your right and select Domain Settings.
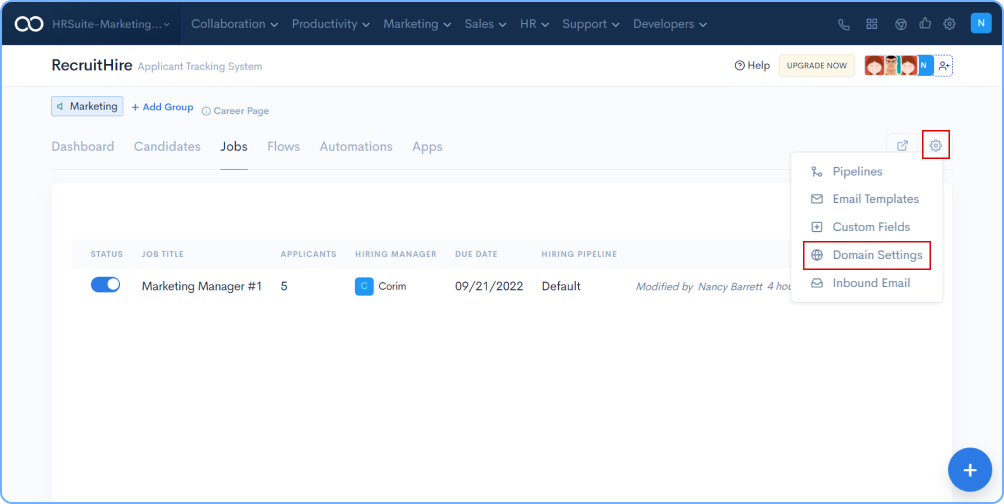
Select the App Level or Group Level based on your requirements. App Level has a default url for Career Page, or you can set a custom shortcut url for your business. After selecting the desired option, click on the Save button.
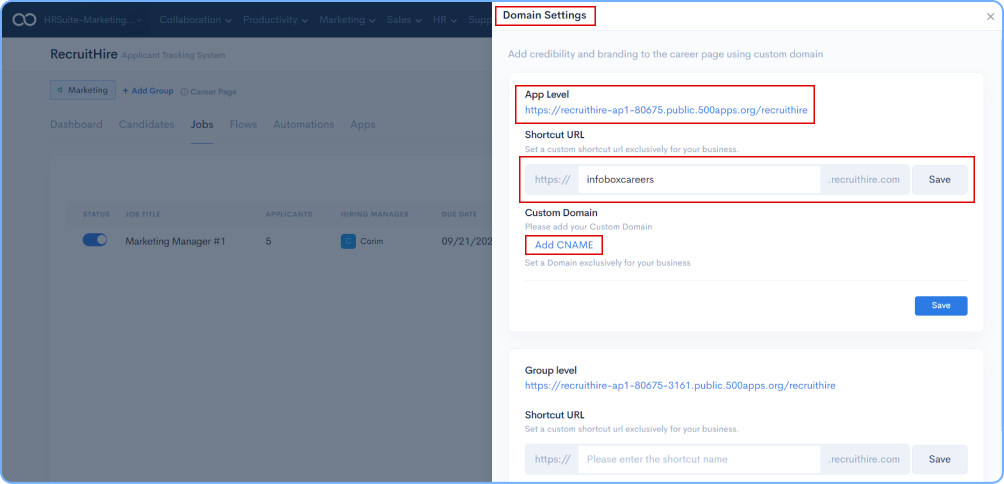
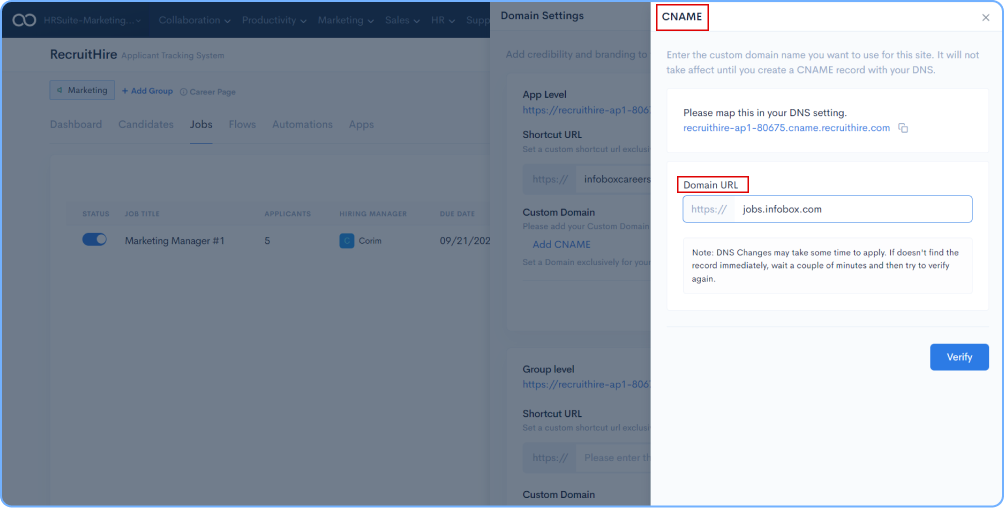
If you need to set a domain exclusively for your business, it is possible by adding CName and clicking on the Verify button as shown in the image below.
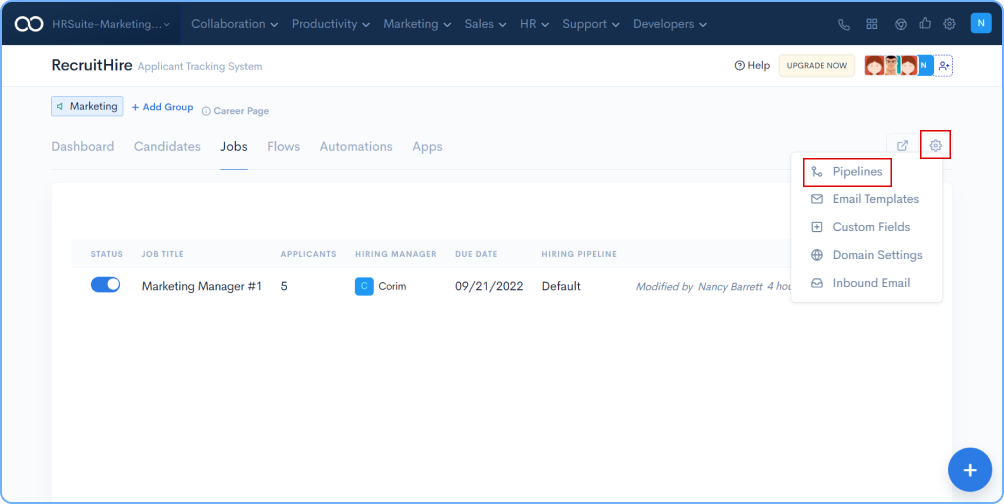
Click on the Settings icon towards your RHS and choose Pipeline from the default list.
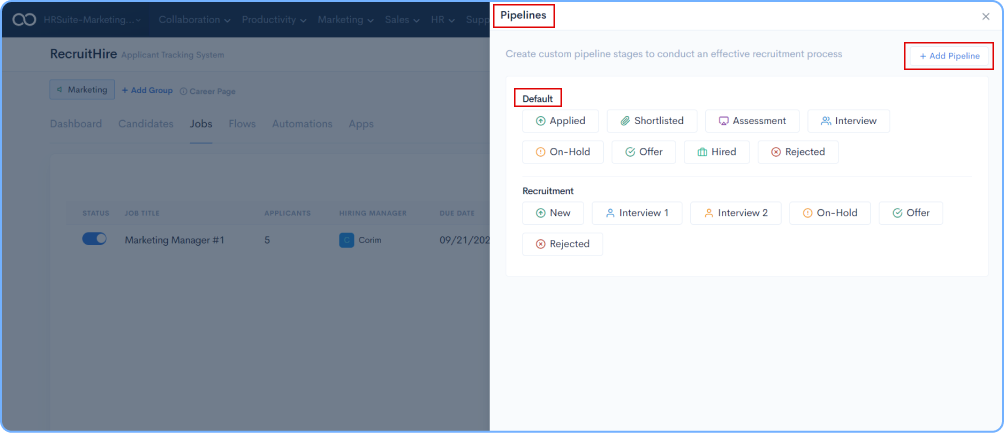
Now click on the Default Pipeline available or click on +Add Pipeline to create a customized one as per your requirements.
Click on Apps in the Dashboard.
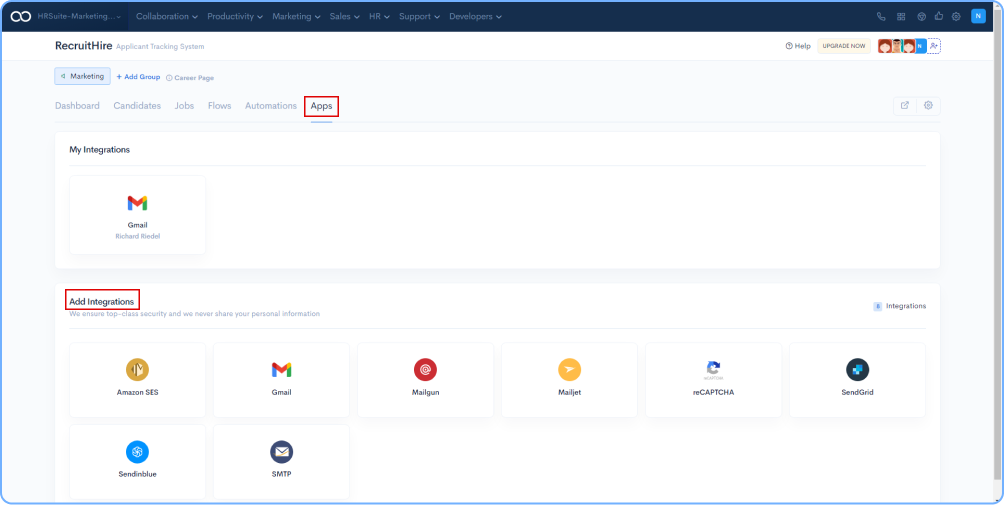
Click on the application required and integrate it.
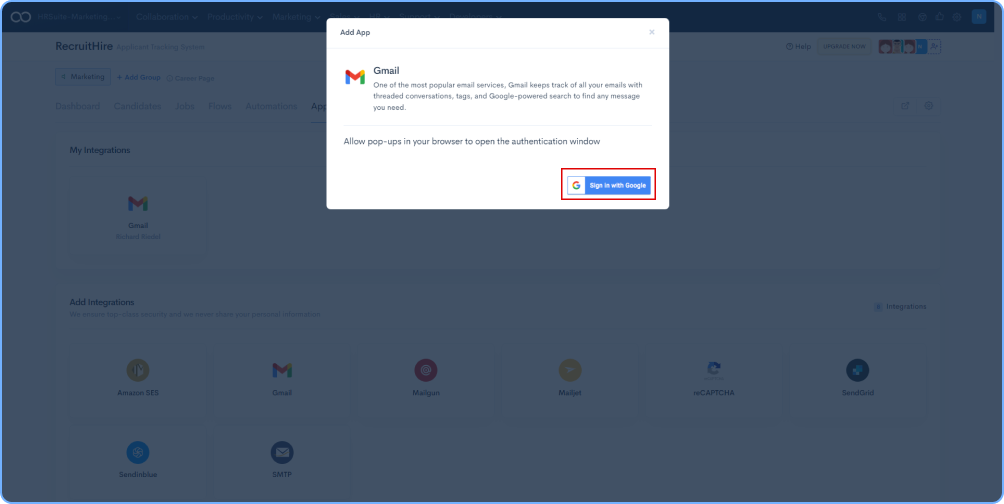
Allow Access to the application.
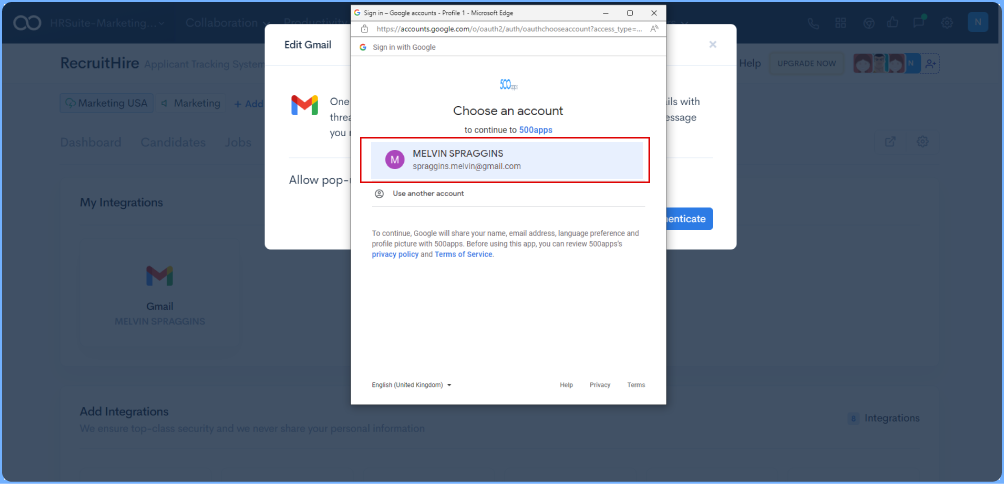
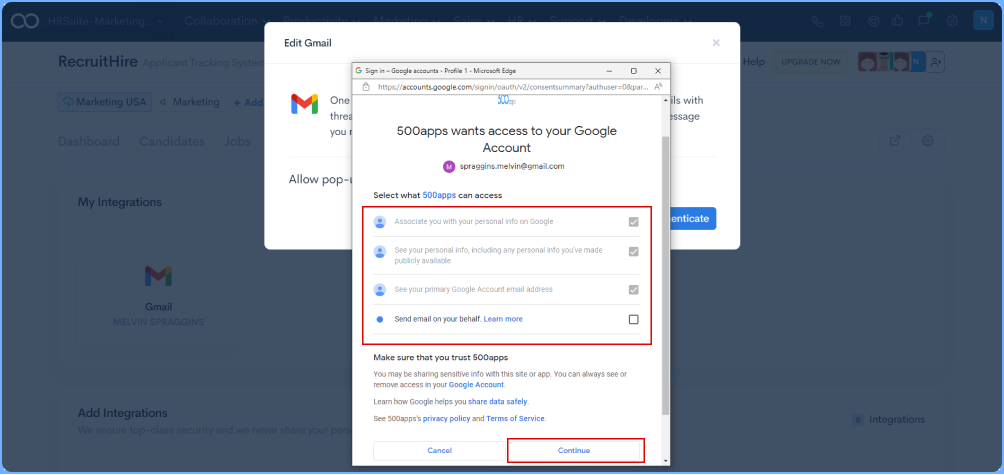
Select what 500 apps can access an click on Continue
Click on Settings Icon in the Dashboard, and click on Email Templates.
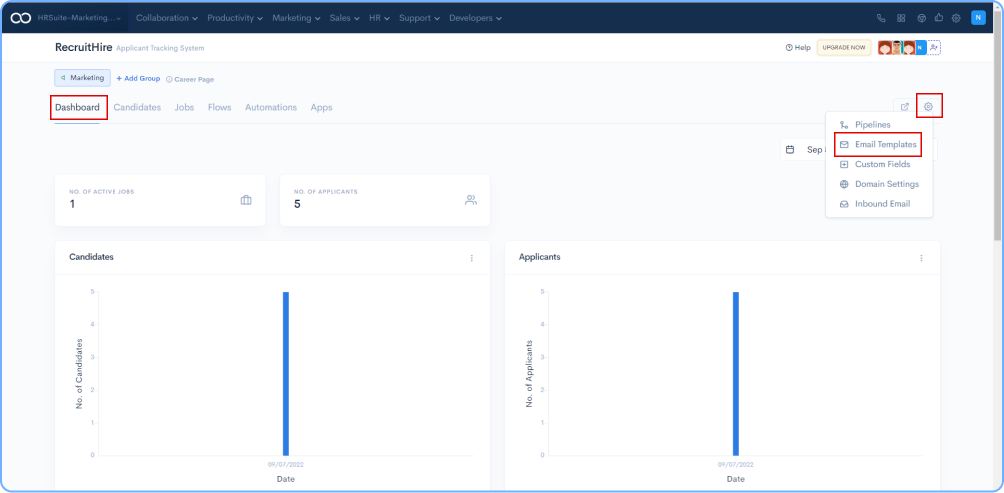
There are 4 pre-defined templates available, choose accordingly or you can also create your own templates by clicking on + Add Email Templates on the RHS.

Enter the Name of the template followed by the Subject of the email template, body and click on Save button.

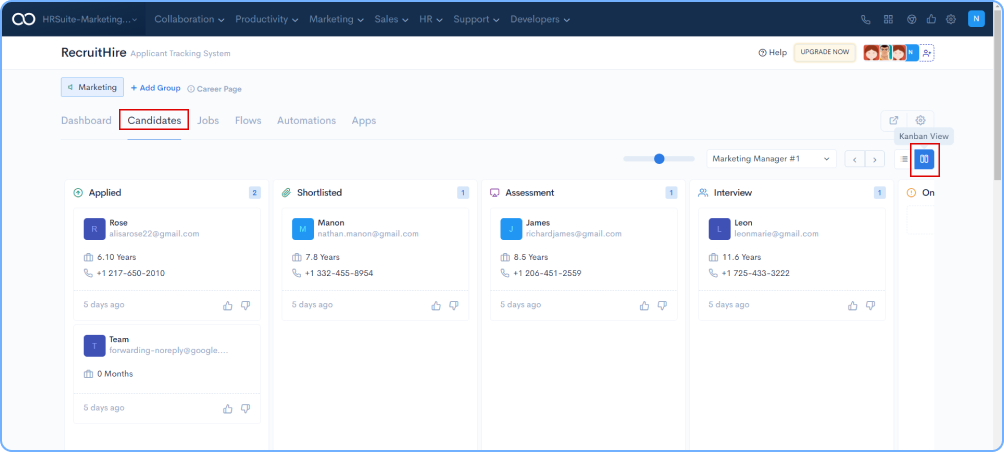
Go to the Candidates tab and select View Type of template on you RHS. The below shown is List View.
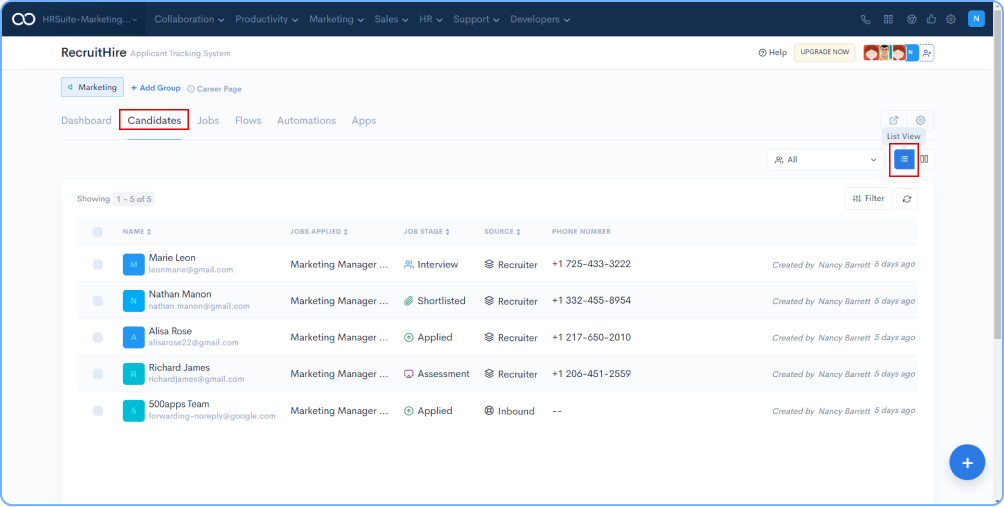
Select Kanban View on your RHS.
